
Rupture Disc Maintenance and Inspection Checklist
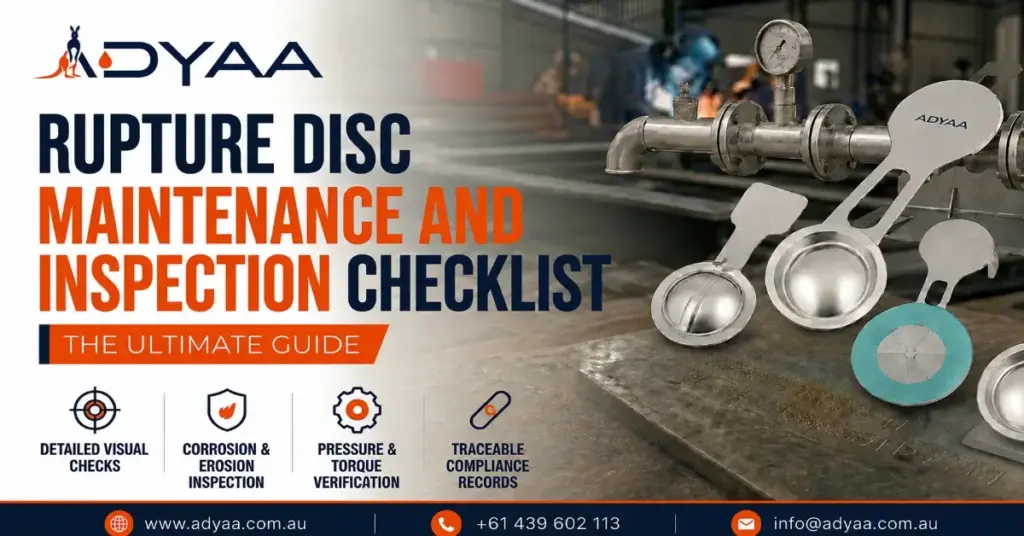
Rupture Disc Maintenance and Inspection Checklist Treating a rupture disc as a “set it and forget it” device is a dangerous compliance violation. Because these are static, non-mechanical safety devices, operators often assume they require zero upkeep. However, hidden corrosion, loose flange bolts, and microscopic metal fatigue can silently alter a disc’s burst pressure over time. To guarantee your overpressure protection activates when needed, plant managers must enforce a strict rupture disc maintenance and inspection protocol. Use this checklist to keep your facility safe and compliant. Quick Reference: Recommended Inspection Frequencies Maintenance Task Recommended Frequency Action Required External Holder Visual Monthly Check for flange corrosion, leaks, and loose bolting. Burst Sensor Loop Test Quarterly Verify electrical continuity to the DCS/SCADA system. Internal Disc Inspection Annual / Turnaround Inspect the dome for pitting, stretching, or product buildup. Preventative Replacement 1 to 3 Years Replacement intervals typically depend on pressure cycling, thermal fatigue, process conditions, and system wear. The Core Rupture Disc Maintenance and Inspection Checklist Routine audits prevent catastrophic failures. Divide your maintenance strategy into external, internal, and electronic checks. 1. External Visual Inspection (Monthly) You do not need to shut down the process to perform external checks. Operators should visually audit the assembly during routine rounds. Inspect the Flange Connections: Look for signs of fugitive emissions, weeping fluids, or localized corrosion around the holder. Check the Tell-Tale Assembly: If you use a pressure gauge between the disc and a safety valve, check it. Any pressure reading above zero indicates a pinhole leak or premature burst. Verify the Tagging: Ensure the stainless steel data tag is securely attached and readable. An auditor will fail your system if the tag is missing. 2. Internal Maintenance (During Shutdowns) When the pipeline is depressurized and safe, remove the holder to inspect the actual rupture disc membrane. Look for Micro-Stretching: If a forward-acting disc looks overly domed or warped, it has suffered metal fatigue from high operating ratios. Check for Chemical Attack: Inspect the process-facing side for microscopic pitting, rust, or chemical discoloration. Examine for Buildup: Ensure polymerized material or crystallized chemicals have not accumulated on the disc, which artificially increases its burst pressure. CRITICAL RULE: Never touch, press, or clean the dome of a rupture disc. Any physical force applied during inspection can damage the calibration. If it is dirty, replace it. 3. Burst Sensor Testing (Quarterly) A burst detector is useless if the wiring is dead. Test the Continuity: Use a multimeter to ensure the closed-loop circuit is intact. Trigger a Test Alarm: Temporarily bypass the sensor to simulate a broken wire, ensuring the control room SCADA system registers the alarm instantly. Establishing Preventative Replacement Intervals You should not wait for a rupture disc to burst before replacing it. The Reality of Fatigue: Every time a pump cycles, the disc flexes. Over months of thermal cycling and pressure spikes, the metal fatigues. Preventative Swaps: To prevent nuisance bursts that shut down production, most reliability engineers mandate a preventative replacement interval. Standard Timelines: In high-pulsation or highly corrosive lines, discs are replaced every 12 months. In stable, clean gas lines, replacement may stretch to 3 years. FAQ – Rupture Disc Maintenance and Inspection Q: Can you repair or clean a rupture disc? A: No. Rupture discs are precision-calibrated, one-time-use items. Cleaning or touching the dome will alter its burst pressure. If it is dirty or damaged, replace it. Q: How often should rupture disc maintenance and inspection be performed? A: External visual checks should be done monthly, electronic sensor tests quarterly, and full internal inspections annually during scheduled plant turnarounds. Q: What causes a rupture disc to burst below its rated pressure? A: Premature bursting is almost always caused by metal fatigue from an excessive operating ratio, temperature spikes, or chemical corrosion thinning the metal. Q: Why is there pressure between my rupture disc and safety valve? A: Pressure in this cavity indicates the rupture disc has developed a pinhole leak, or it has burst entirely. The disc must be replaced immediately. Q: Can I reuse a rupture disc if I remove it for inspection? A: Generally, no. Once a disc is torqued into a holder and exposed to process pressure, removing it alters the critical “bite” of the seal. Most manufacturers strongly advise against re-torquing a used disc. Q: Do rupture disc holders need maintenance? A: Yes. The seating surfaces of the holder must be cleaned with a soft solvent and inspected for scratches or pitting before installing a new disc to ensure a leak-tight seal. Maintain Your Plant Integrity with ADYAA Do not let poor maintenance practices jeopardize your facility. Sourcing the right overpressure devices and maintaining them correctly requires expert guidance. As Australia’s premium industrial safety supplier, ADYAA provides fully certified rupture discs, precision-machined holders, and automated burst detection systems. Consult with ADYAA Maintenance Experts Today Rupture Disc Material Selection Guide for Harsh Processes Rupture Disc Maintenance and Inspection Checklist If you pump highly corrosive acids or superheated steam through a standard stainless steel… Read More → Rupture Disc Maintenance and Inspection Checklist Rupture Disc Maintenance and Inspection Checklist Treating a rupture disc as a “set it and forget it” device is a… Read More → Types of Rupture Discs: Complete Guide to All Designs Types of Rupture Discs: Complete Guide to All Designs Pressure systems are unpredictable. When a mechanical safety valve freezes or… Read More →
Types of Rupture Discs: Complete Guide to All Designs
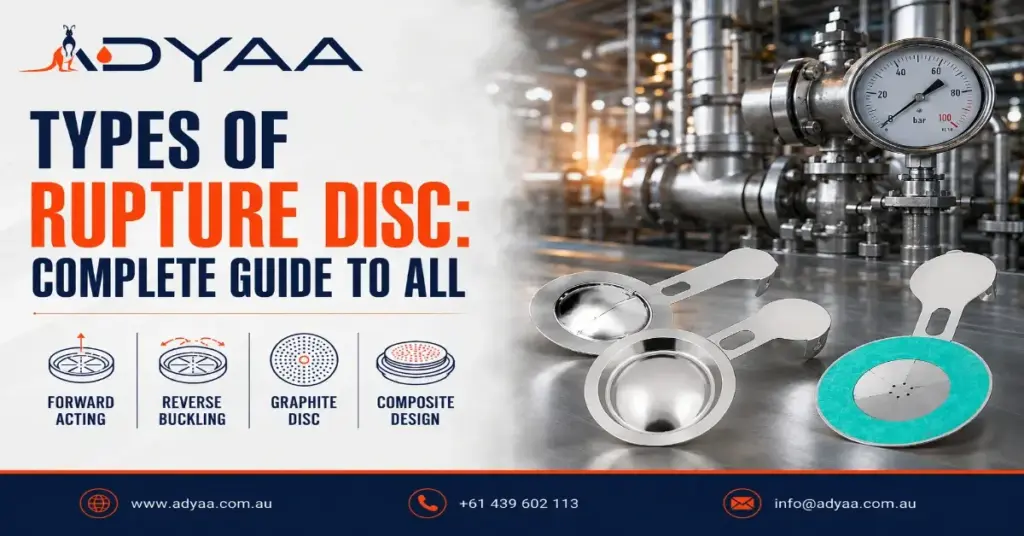
Types of Rupture Discs: Complete Guide to All Designs Pressure systems are unpredictable. When a mechanical safety valve freezes or a process reaction runs away, a rupture disc is your absolute last line of defense against a catastrophic blowout. But not all bursting discs are engineered the same way. Installing the wrong disc in a high-pulsation line or a highly corrosive chemical loop can lead to premature fatigue, nuisance bursting, or worse—total failure to relieve pressure. Understanding the different types of rupture discs is critical for plant managers, reliability engineers, and safety inspectors. In this guide, we break down the core designs, how they operate, and exactly where they belong in your facility. Quick Comparison: Major Rupture Disc Designs Disc Type Operating Ratio Fragmentation Best Application Forward-Acting Up to 80% Often fragments General pressure relief, low cost Reverse-Acting Up to 95% Non-fragmenting High-pulsation, isolating safety valves Graphite Up to 80% Fragments Highly corrosive chemical environments Core Rupture Disc Designs 1. Forward-Acting Rupture Discs (Tension Loaded) The forward-acting disc is the traditional workhorse of overpressure protection. In this design, the dome of the disc faces the process media. As pressure builds, the metal is subjected to tension. Once it hits the exact calibrated burst pressure, the metal stretches past its tensile strength and bursts outward. Operating Ratio: Typically limited to 70% to 80% of the marked burst pressure. Operating too close to the burst limit causes metal fatigue. Fragmentation: Older, solid-metal designs fragment upon bursting. However, modern scored (cross-scored) forward-acting discs open along pre-weakened lines to prevent shrapnel. Best For: General manufacturing applications and low-pulsation environments where downstream debris is not a critical concern. 2. Reverse-Acting Rupture Discs (Compression Loaded) Reverse-acting discs flip the engineering upside down. The dome faces against the process pressure. Instead of stretching the metal (tension), the process pressure pushes against the dome (compression). When the burst pressure is reached, the dome buckles and reverses, striking a knife blade or tearing along a scored line to open fully. High Operating Ratio: Because metal handles compression better than tension, these discs can operate continuously at up to 90% or 95% of their rated burst pressure without suffering fatigue. Non-Fragmenting: The buckling action allows the disc to tear open cleanly without sending metal fragments downstream. Best For: High-pulsation environments, isolating safety relief valves (no shrapnel to damage internal valve mechanics), and high-efficiency gas/liquid lines. 3. Graphite Rupture Discs When process media is heavily corrosive, standard stainless steel or Inconel discs degrade quickly, drastically altering their burst pressure. Graphite rupture discs are machined from high-purity, resin-impregnated graphite, making them immune to most acids, alkalis, and organic solvents. Corrosion Resistance: Offers superior survival in aggressive chemical and petrochemical environments. Fragmentation: Graphite is brittle and shatters upon bursting. It cannot be used directly upstream of a safety relief valve. Best For: Highly corrosive pipelines and low-pressure applications venting to a flare header or containment tank. How to Choose the Right Type of Rupture Disc Specifying the right overpressure device comes down to evaluating your specific pipeline conditions. Essential Selection Criteria 1. Operating Ratio Considerations If your normal operating pressure is very close to your maximum allowable working pressure (MAWP), you must use a reverse-acting disc. A forward-acting disc will fatigue and fail under those tight margins. 2. Downstream Fragmentation Sensitivity If you are venting into a delicate manifold or protecting a safety valve, you must use a non-fragmenting reverse-acting or scored forward-acting disc. Never use a standard solid-metal or graphite disc in these positions. 3. Media and Corrosion Resistance For standard steam, gas, or water, metallic discs are perfect. For aggressive acids like hydrochloric or sulfuric acid, graphite or exotic alloys (like Hastelloy or Tantalum) are mandatory to prevent the burst pressure from drifting due to corrosion. FAQ – Types of Rupture Discs Q: What is a rupture disc? A: A rupture disc is a non-reclosing pressure relief device that bursts at a predetermined pressure to protect industrial systems from catastrophic overpressure. Q: What is the difference between forward-acting and reverse-acting rupture discs? A: Forward-acting discs burst under tension and typically fragment, while reverse-acting discs buckle under compression, allowing for higher operating pressures without sending shrapnel downstream. Q: Can a rupture disc be used with a safety relief valve? A: Yes, but only non-fragmenting discs (like reverse-acting or cross-scored discs) should be used upstream to prevent metal fragments from jamming the safety valve internals. Q: What does the operating ratio of a rupture disc mean? A: It is the maximum allowable ratio between the system’s normal operating pressure and the disc’s marked burst pressure, usually expressed as a percentage (e.g., 80% or 95%). Q: Why use a graphite rupture disc? A: Graphite rupture discs offer extreme corrosion resistance, making them the best choice for highly aggressive chemical and petrochemical environments where metal would degrade. Q: Can you reuse a ruptured disc? A: No. Rupture discs are strictly one-time-use safety devices. Once they burst, they must be completely replaced to restore system protection. Secure Your Plant with ADYAA Pressure Relief Solutions Do not leave your plant’s safety to guesswork. Choosing between the different types of rupture discs requires precision engineering and a deep understanding of process dynamics. As a leading supplier across Australia, ADYAA provides ASME and API-compliant overpressure protection designed to keep your facility safe and operational. Consult with ADYAA Overpressure Experts Today. Rupture Disc Operating Ratio Explained (Avoid Premature Failure) Rupture Disc Operating Ratio Explained (Avoid Premature Failure) If your pressure relief devices are blowing during normal plant operations, you… Read More → Rupture Disc Selection Guide: 5 Critical Steps Rupture Disc Selection Guide: 5 Critical Steps Industrial plants cannot afford guesswork when it comes to overpressure protection. Picking a… Read More → Guide to MNSB 53 for Fabrication Guide to MNSB 53 for Fabrication: Stop Moving Heavy Steel Let’s talk about the biggest bottleneck in a heavy fabrication… Read More →
Burst Pressure Temperature Calculation: A Definitive Guide
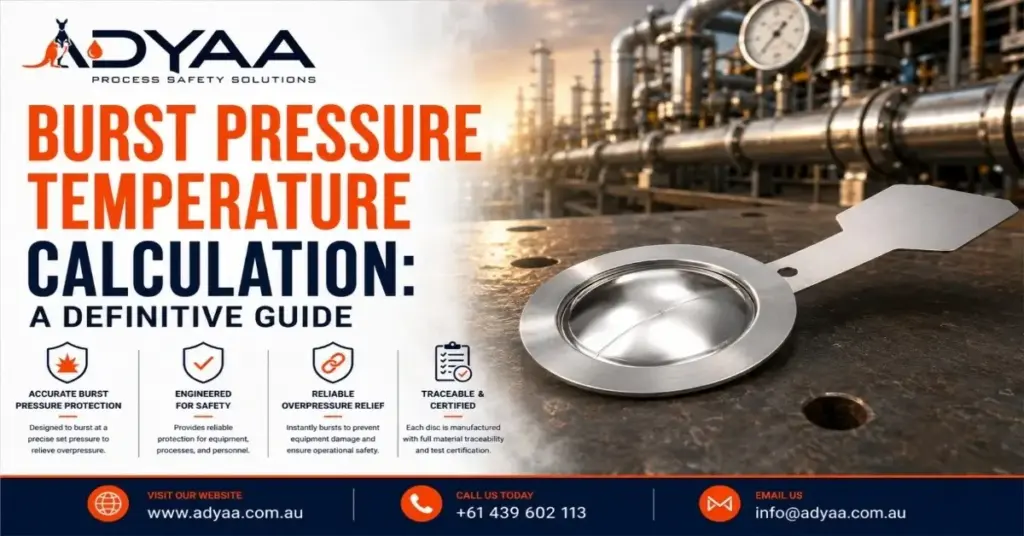
Burst Pressure Temperature Calculation: A Definitive Guide When designing an overpressure protection system, specifying a rupture disc based solely on ambient temperature is a dangerous engineering oversight. The tensile strength of metals and graphite changes drastically as temperatures rise. If a process spikes to 400°C, the disc will burst far below its stamped rating, leading to nuisance bursting, process downtime, and lost product. To guarantee that your safety systems activate exactly at your Maximum Allowable Working Pressure (MAWP), engineers must perform a precise burst pressure temperature calculation. This guide breaks down the core physics, the derating formulas, and how to apply them to real-world industrial pipelines. Quick Reference: Thermal Limits of Common Disc Materials Material Max Operating Temp (°C) Temperature Sensitivity 316 Stainless Steel ~480°C Strength reduces significantly at elevated temperature Nickel 200 ~400°C Good thermal resistance Monel 400 ~430°C Stable in moderate high-temperature service Inconel 600 ~590°C+ Excellent high-temperature stability Graphite ~200°C (Standard) Very thermally stable until oxidation/degradation Understanding Coincident Temperature In overpressure engineering, you cannot separate pressure from heat. The coincident temperature is defined as the exact expected temperature of the disc material at the exact moment the burst pressure is reached. Because industrial rupture discs are precision-calibrated membranes, heat expands their molecular structure, lowering the amount of physical force (pressure) required to tear or buckle the dome. Therefore, a rupture disc rated to burst at 100 PSI at 20°C may rupture at a lower pressure, such as around 85 PSI, when exposed to elevated operating temperatures like 250°C due to the reduction in material strength at higher temperatures. (Note: Actual reduction depends on disc material, thickness, manufacturing method, and ASME temperature correction factors. ) The Core Formula for Temperature Derating To find the actual burst pressure of a disc at an elevated temperature, manufacturers use a temperature correction factor (often referred to as a derating factor). The foundational burst pressure temperature calculation is: PT=PA×CF Where: PT = corrected burst pressure at operating temperature PA = burst pressure at ambient/reference temperature CF = temperature correction factor Example: If: PA =100 PSI CF =0.85 Then: PT =100×0.85=85 PSI Note: While engineers use this formula for estimations, rupture disc manufacturers test batches of material in thermal chambers to establish exact, certified curves for every specific lot. How Material Selection Impacts Burst Pressure Calculations If the operating or coincident temperature fluctuates significantly, highly temperature-sensitive materials such as Stainless Steel or Aluminum may experience greater variation in burst pressure due to the reduction in mechanical strength at elevated temperatures. To improve burst pressure stability across varying temperatures, higher-performance materials are often selected: Inconel 600: This nickel-chromium superalloy retains its mechanical strength exceptionally well at elevated temperatures. Its temperature correction curve is relatively stable, making it suitable for high-temperature steam, refinery, and petrochemical applications. Graphite: Resin-impregnated graphite rupture discs exhibit excellent thermal stability and are less affected by thermal softening compared to metallic discs. Within their recommended operating range, the temperature correction effect is often minimal for many standard applications. FAQ – Burst Pressure Temperature Calculation Q: What is coincident temperature? A: Coincident temperature is the exact physical temperature of the rupture disc material at the exact moment it is required to burst. Q: Why does a rupture disc burst at a lower pressure when hot? A: Heat alters the molecular structure of the metal, lowering its tensile and yield strength, meaning less pressure is required to tear or buckle the dome. Q: Can I calculate the exact temperature correction factor myself? A: No. While you can estimate it, the exact correction factor varies by the specific batch of raw material and must be certified by the manufacturer through destructive thermal testing. Q: What material should I use for highly fluctuating temperatures? A: Inconel 600 is highly recommended for fluctuating high-temperature environments because its tensile strength remains remarkably stable compared to standard stainless steel. Q: How does cold temperature affect burst pressure? A: Extreme cold (cryogenic temperatures) increases the tensile strength of the metal, which will artificially raise the burst pressure, requiring a reverse temperature calculation. Q: Do graphite rupture discs need temperature correction? A: Generally, no. Graphite remains physically stable and its burst pressure does not fluctuate significantly with heat, provided it stays below the thermal limit of its resin binder. Engineer Your Overpressure Protection with ADYAA Precision engineering leaves zero room for error. Calculating the thermal impact on your safety devices requires exact metallurgical data and certified manufacturing. As Australia’s leading supplier of industrial safety solutions, ADYAA provides fully tested, ASME-certified rupture discs calibrated for your exact coincident temperatures. Consult with ADYAA Overpressure Experts Today Rupture Disc Material Selection Guide for Harsh Processes Rupture Disc Maintenance and Inspection Checklist If you pump highly corrosive acids or superheated steam through a standard stainless steel… Read More → Rupture Disc Maintenance and Inspection Checklist Rupture Disc Maintenance and Inspection Checklist Treating a rupture disc as a “set it and forget it” device is a… Read More → Types of Rupture Discs: Complete Guide to All Designs Types of Rupture Discs: Complete Guide to All Designs Pressure systems are unpredictable. When a mechanical safety valve freezes or… Read More →
Mechanical Seal Failure Causes & Prevention
Mechanical Seal Failure Causes & Prevention A leaking pump is a massive liability. When fluid escapes along a rotating shaft, your facility faces environmental fines, safety hazards, and immediate production losses. Understanding Mechanical Seal Failure Causes & Prevention is the most effective way to protect your rotating equipment. Most seals do not simply wear out from old age. They are destroyed by operational errors, poor system design, or incorrect material specifications. Here is how to identify the root cause of your pump leaks and engineer a permanent solution. The Top 3 Reasons Mechanical Seals Fail To stop chronic leaks, you must understand what is actively destroying your components inside the stuffing box. Dry Running: This is the absolute most common killer of mechanical seals. If a pump loses fluid, the seal faces generate massive friction and heat. They will shatter or melt within minutes. Shaft Deflection and Vibration: Misaligned pumps cause the rotating shaft to vibrate. This aggressive movement forces the seal faces to open and close rapidly, allowing fluid to escape and damaging internal springs. Chemical and Thermal Incompatibility: Just as we saw in our guide on Choosing Gasket Materials for Chemical Resistance, using the wrong elastomers causes rapid degradation. A harsh solvent will quickly eat through an incompatible secondary O-ring inside the seal. Proven Prevention Strategies Implementing strong Mechanical Seal Failure Causes & Prevention protocols requires moving from reactive repairs to proactive engineering. Implement Proper Flush Plans: Always use an API flush plan to keep the seal faces cool, clean, and lubricated. A proper flush removes trapped heat and abrasive particles, eliminating the risk of dry running. Laser Align Your Pumps: Never rely on a straightedge. Laser alignment guarantees the pump and motor shafts run perfectly true. This eliminates the vibration that physically beats seal faces to death. Upgrade Your Materials: Match the seal faces (like Silicon Carbide or Tungsten Carbide) and the secondary elastomers to the specific fluid. For extreme heat, mastering O-Ring Material Selection for Harsh Environments for your internal seal components is mandatory. Real-World Example: Australian Mining Slurry Consider an Australian mining operation pumping highly abrasive slurry. Standard carbon seal faces were wearing out weekly due to the abrasive grit acting like sandpaper. The facility was losing thousands in downtime, maintenance labor, and replacement parts. The Solution: By analyzing Mechanical Seal Failure Causes & Prevention, the plant upgraded to hard Silicon Carbide seal faces and installed a dedicated clean-water flush plan. This simple engineering change extended the seal life from weeks to over a year, drastically improving operational profitability. People Also Ask (FAQS) Q: What happens if a mechanical seal runs dry? A: Running dry removes the thin fluid film between the seal faces. This causes extreme friction, severe thermal shock, and immediate cracking or melting of the seal components. Q: How can I tell if pump vibration is damaging my seal? A: Look for uneven wear patterns on the seal faces or fretting (deep grooves) on the pump shaft. Excessive noise and excessive heat around the bearing housing are also early warning signs. Q: Why is my mechanical seal leaking immediately after installation? A: Immediate leaks usually indicate an installation error. This includes a pinched O-ring, improper spring compression, or a severely misaligned pump shaft. The Bottom Line You cannot accept continuous pump leaks as a normal cost of doing business. Mastering Mechanical Seal Failure Causes & Prevention allows you to identify exactly why a component is breaking down, whether it is from extreme friction, chemical attack, or shaft misalignment. By upgrading your materials and maintaining strict installation standards, you guarantee long-term pump reliability. Protect Your Rotating Equipment Stop replacing the same failed seals month after month. If your Australian facility struggles with chronic pump leaks or premature wear, the ADYAA Engineering Team is ready to help. Reach out to us today for expert root cause analysis, custom flush plan recommendations, and high-performance sealing upgrades designed for your exact operating conditions. Portable Metal Marking Machine Guide Portable Metal Marking Machine Guide: Deep Traceability Anywhere In heavy industry, moving massive steel assets just to stamp a serial… Read More → Handheld Dot Peen Marker for Fabrication Handheld Dot Peen Marker for Fabrication: The Ultimate Guide For heavy industrial fabrication, a handheld dot peen marker is the… Read More → Gems 3100/3200 Pressure Transmitters : Complete Guide Gems 3100/3200 Pressure Transmitters: Complete Guide Accurate pressure monitoring is essential across industrial environments where process visibility, operational consistency and… Read More →
Portable Metal Marking Machine Guide
Portable Metal Marking Machine Guide: Deep Traceability Anywhere In heavy industry, moving massive steel assets just to stamp a serial number wastes time and risks worker safety. A portable metal marking machine solves this by letting operators bring industrial-grade traceability directly to the asset. Whether you are in a remote staging yard or a busy fabrication shop, these handheld systems deliver permanent, machine-readable codes on the toughest alloys. Example: Marking safety-critical heat numbers on a 10-meter structural steel column right where it sits on the shop floor, bypassing the need for overhead cranes. As a leading supplier in Australia, ADYAA distributes rugged portable metal marking machines designed to withstand the harsh conditions of mining, offshore oil rigs, and heavy manufacturing. Portable Marking vs Manual Stamping Specification Portable Metal Marking Machine Traditional Manual Hand Stamping Data Accuracy 100% (Automated via software/scanners) Low (Prone to human error) Speed & Consistency Fast and uniform depth Slow and inconsistent Code Types Text, Logos, 2D Data Matrix codes Basic alphanumeric text only Operator Safety High (No hammer strikes needed) Low (Risk of hand/finger injuries) ERP Integration Yes (Wi-Fi and Barcode scanning) None What Is a Portable Metal Marking Machine? A portable metal marking machine is a mobile dot peen device that uses an electrically or pneumatically driven stylus to physically indent metal substrates. Operating entirely without heat, it creates overlapping micro-craters that form highly durable serial numbers, batch codes, and logos. Because the unit is handheld—often powered by heavy-duty 18V lithium-ion batteries—it provides total mobility for identifying large, immobile assets. Real-World Example: Engraving a permanent maintenance date code onto an installed pipeline valve out in the field. Why ADYAA is the Preferred Supplier in Australia Sourcing industrial equipment requires a partner who understands local demands. Heavy-Duty Distribution: We supply machines engineered for the intense heat, dust, and vibration typical of Australian mining and fabrication sectors. Turnkey On-Site Support: Our team provides direct onsite calibration, custom faceplate machining (for odd-shaped parts), and comprehensive operator training. Rapid Maintenance: We stock all replacement styluses and spare parts locally to ensure your production line never stops. Benefits of a Portable Metal Marking Machine Replacing manual stamping with a digital portable system immediately improves plant operations: Eliminates Human Error: Built-in software connects to your ERP. Operators simply scan a work order, and the machine automatically prints the correct serial number. Survives Harsh Post-Processing: The deep physical indentations easily survive shot blasting, painting, and hot-dip galvanizing. Maximum Workplace Safety: Replaces the dangerous use of hammers and manual steel punches, drastically reducing hand-related workplace injuries. Example: Safely marking a curved pipe using a magnetic V-block faceplate. How to Choose the Best Portable Metal Marking Machine Facility managers must match the machine’s specifications to the physical realities of the job site. Check Your Power Constraints: If operators work entirely off-grid, select a 100% Battery-Powered Electromagnetic Machine. If working in a shop with compressed air, choose a Pneumatic Machine for extreme depth. Match Stylus to Metal: Standard carbide styluses handle mild steel perfectly. If you mark hardened metals (like titanium or D2 tool steel), require a diamond-tipped stylus. Evaluate Connectivity: Ensure the machine features built-in Wi-Fi and touchscreen controls so operators do not need to drag a laptop into the dirt. Common Mistakes When Buying a Portable Metal Marking Machine Buying the wrong configuration leads to illegible marks and frustrated workers. Here is how ADYAA engineers solve these issues: 1. Ignoring Operator Fatigue The Mistake: Buying a heavy, poorly balanced 6 kg marking head for operators who need to mark 300 pipes a day, causing severe wrist strain. The ADYAA Solution: We distribute lightweight, ergonomically balanced units under 3 kg with optional magnetic clamping bases for totally hands-free operation. 2. Underestimating Coating Thickness The Mistake: Using a low-power electric marker on steel plates that will later receive a thick layer of industrial epoxy. The mark disappears. The ADYAA Solution: We supply high-pressure pneumatic systems capable of gouging up to 1.0mm into the steel, guaranteeing readability through thick coatings. FAQ – Portable Metal Marking Machine Q: What metals can it mark? A: It easily marks mild steel, aluminum, cast iron, brass, and hardened tool alloys up to 62 HRC. Q: Does it require an air compressor? A: Pneumatic models require compressed air for deep marking, while electromagnetic models run entirely on battery power. Q: How heavy is the machine? A: Most premium industrial handheld units weigh between 2.5 kg and 4.0 kg for comfortable one-handed operation. Q: Can it engrave machine-readable QR codes? A: Yes, these systems easily engrave 2D Data Matrix codes, QR codes, and complex company logos. Q: Will the mark survive heavy painting? A: Yes. Deep pneumatic indentations remain highly legible even after thick powder coating or galvanization. Q: Do I need a laptop to run it on the floor? A: No. Our premium units feature built-in touchscreens and onboard memory to hold thousands of marking files. Secure Your Traceability with ADYAA Do not compromise on your quality control. As a dedicated distributor and supplier, ADYAA provides the most advanced portable metal marking machines across Australia. From the offshore rigs of Western Australia to the steel fabricators of Sydney, we supply the exact industrial hardware required to secure your critical data. Consult with ADYAA Traceability Experts Today Portable Metal Marking Machine Guide Handheld Dot Peen Marker for Fabrication: The Ultimate Guide For heavy industrial fabrication, a handheld dot peen marker is the… Read More → Handheld Dot Peen Marker for Fabrication Handheld Dot Peen Marker for Fabrication: The Ultimate Guide For heavy industrial fabrication, a handheld dot peen marker is the… Read More → Gems 3100/3200 Pressure Transmitters : Complete Guide Gems 3100/3200 Pressure Transmitters: Complete Guide Accurate pressure monitoring is essential across industrial environments where process visibility, operational consistency and… Read More →
Industrial Handheld Marker for Deep Engraving
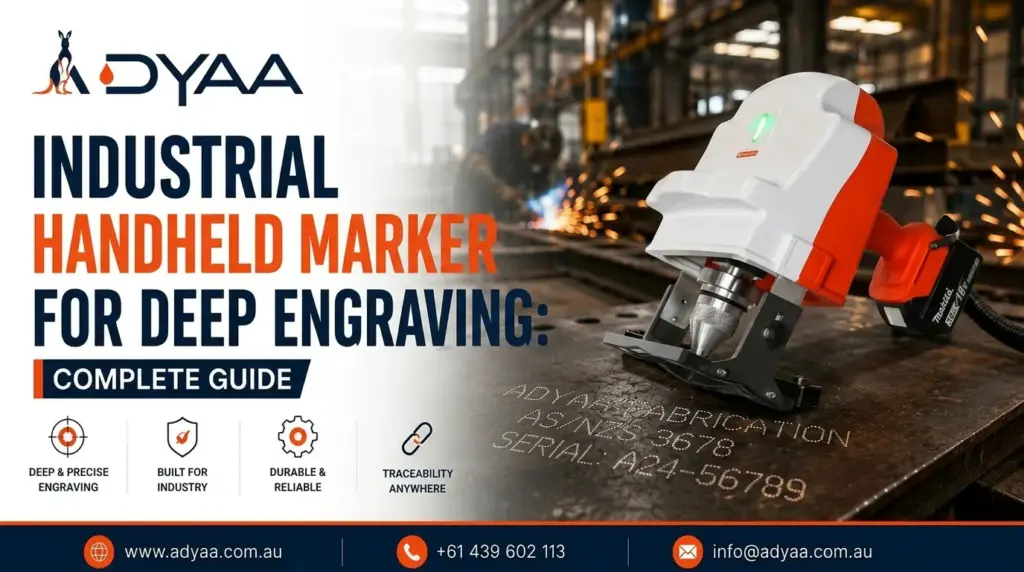
Industrial Handheld Marker for Deep Engraving: Complete Guide When metal assets are destined for extreme environments, standard surface-level identification is not enough. If your parts will be exposed to severe abrasion, sandblasting, or thick industrial coatings, you need an industrial handheld marker engineered specifically for deep engraving. By bringing high-impact pneumatic or electromagnetic force directly to heavy structural components, you guarantee that your critical data remains readable for the entire lifecycle of the asset. Real-World Example: Deeply engraving heat batch numbers into a raw steel casting right before it is sent off for heavy shot-blasting and thick epoxy painting. As a premier supplier in Australia, ADYAA distributes heavy-duty industrial handheld markers built to withstand the punishing demands of the mining, maritime, and structural steel fabrication sectors. Technical Comparison: Deep Pneumatic vs Shallow Electric Engraving Specification Pneumatic Handheld Marker (Deep) Electric Handheld Marker (Standard) Power Source Compressed Air + Battery/110V 100% Battery Operated Impact Force Maximum (High-pressure piston) Moderate (Electromagnetic solenoid) Marking Depth Up to 1.0mm+ Up to 0.5mm Coating Survivability Excellent (Hot-dip galvanizing, thick paint) Good (Light paint, standard outdoor exposure) Best Application Cast iron, D2 tool steel, heavy alloys Mild steel, aluminum, plastics What Is an Industrial Handheld Marker? An industrial handheld marker is a portable dot peen system designed to physically indent heavy metals. Housed in an impact-resistant casing, it drives a high-density tungsten carbide stylus into the metal at rapid frequencies. This cold-marking process creates permanent, deep-gouged serial numbers, 2D Data Matrix codes, and logos without warping or heating the substrate. Real-World Example: Operators carrying the marker across a staging yard to permanently stamp compliance data onto massive, immobile oil and gas pipeline flanges. Why ADYAA is the Preferred Supplier in Australia Heavy industries cannot afford to rely on fragile equipment. Sourcing from a specialized partner ensures your tools survive the job site. Heavy-Duty Distribution: ADYAA supplies markers specifically rated for the intense dust, drop hazards, and heat found across Australian mining and fabrication sites. On-Site Calibration: Our engineering team visits your facility to set optimal air pressures, calibrate marking depths, and train your workforce. Rapid Consumable Supply: We stock replacement carbide styluses, batteries, and faceplates locally to guarantee zero downtime for your traceability operations. Benefits of an Industrial Handheld Marker for Deep Engraving Upgrading to a specialized deep-marking system secures your supply chain and improves factory workflow: Survives Extreme Post-Processing: The deep indentations ensure that barcodes and serial numbers remain perfectly legible even after aggressive hot-dip galvanizing or industrial powder coating. Eliminates Material Handling Bottlenecks: Workers mark 10-ton steel beams exactly where they sit on the floor, completely removing the need to schedule dangerous overhead crane lifts. Automated Data Accuracy: Integrated Wi-Fi and barcode scanners allow the marker to pull exact serial numbers from your ERP system, eliminating manual typing errors. Example: Scanning a traveler document to instantly load a 15-character VIN into the marker. How to Choose the Best Industrial Handheld Marker To achieve true deep engraving, facility managers must specify the correct hardware configuration. Select Pneumatic for Maximum Depth: If your parts are going into a galvanizing bath, you must choose a compressed air-driven marker. Air pressure delivers the brute force required to gouge deep into heavy alloys. Match Stylus Hardness to the Substrate: A standard stylus will quickly dull on hardened steel. For metals up to 62 HRC, specify an extreme-density carbide or diamond-tipped stylus. Assess the Faceplate Design: Choose a flat faceplate for standard plates, or a V-shaped magnetic faceplate if you are primarily deep engraving curved pipes and cylinders. Common Mistakes When Buying an Industrial Handheld Marker Failing to match the machine’s power to your specific metal leads to invisible marks. Here is how ADYAA prevents common procurement errors: 1. Relying on Battery Power for Galvanized Parts The Mistake: Buying a fully electric marker for structural steel that will be thickly galvanized. The electric solenoid cannot strike deep enough, and the zinc fills the shallow mark. The ADYAA Solution: For deep coating survival, we strictly supply High-Pressure Pneumatic Markers that punch deep enough to remain visible through heavy zinc layers. 2. Ignoring High-Volume Operator Fatigue The Mistake: Forcing a worker to manually press a vibrating, 5 kg pneumatic marking head against steel plates for an entire 8-hour shift, resulting in crooked marks and wrist injuries. The ADYAA Solution: We supply deep-engraving markers equipped with Electromagnetic Clamping Bases. The operator presses a button, the marker locks itself to the steel, and the machine engraves hands-free. FAQ – Industrial Handheld Marker Q: How deep can an industrial handheld marker engrave? A: High-end pneumatic models can achieve depths exceeding 1.0mm in mild steel, depending on the air pressure and stylus angle. Q: Will the mark survive hot-dip galvanizing? A: Yes. Deep pneumatic dot peen engraving is the industry standard for parts that undergo hot-dip galvanizing or thick epoxy coating. Q: Does deep engraving weaken the metal? A: No. Dot peen is a cold-working process that displaces metal without inducing thermal stress or micro-cracking, preserving structural integrity. Q: What is the hardest metal these machines can mark? A: With a specialized diamond-tipped stylus, these markers can easily engrave hardened alloys and tool steels up to 62 HRC. Q: Can I mark logos and QR codes with this tool? A: Absolutely. The integrated software allows you to upload custom DXF logos, QR codes, and 2D Data Matrix codes for deep engraving. Q: Do I need to be plugged into a wall outlet? A: No. Many deep-engraving pneumatic models feature an 18V battery to power the controller, requiring only a standard airline connection for the striking force. Secure Your Traceability with ADYAA Do not risk losing critical asset data to harsh environments or thick paints. As a distributor and supplier, ADYAA provides the most powerful industrial handheld markers across Australia. From the fabrication hubs of Sydney to the remote outback mining sites, we supply the rugged hardware needed to guarantee permanent traceability. Consult with ADYAA Traceability Experts Today. Handheld Dot Peen Marker for Fabrication Handheld